
Lab Updates:
Welcome to the Lab
This page serves as the continuous integration and testing sandbox for any enterprise-grade networking, virtualization and security configurations. My goal is to simulate real-world infrastructure challenges to test my own skills in system administration, network segmentation and any deployments.
- Hybrid Networking: Managed via a UniFi Cloud Gateway Ultra utilizing VLAN segmentation to isolate an IoT network, guest network, management, home connected devices and production traffic.
- Virtualization & computing: Running a high availability environment such as Proxmox VE to host services such as Docker containers, Pi-hole, Game servers, PXE host servers & Windows 10 Enterprise guest VMs.
- Security First Design: By using VLANs to segment my network traffic I'm ensuring safety to all network users, as game servers are port-forwarded to the outside world, security is a massive consideration within this project. I have thought of this and decided to go with Ubiquiti's Unifi line of devices for my home network, this will help me ensure proper port-forwarding, a great built in network firewall, proper home firewall & proper VLAN capabilities.
22nd of January 2026: Scoring the HP Prodesk
The Journey began with finding a cheap workstation on Facebook Marketplace the specs were really good for the price it was a HP ProDesk 600 G3 with an i7-7700, 16GB of DDR4 running at 3200MHz and a 256GB SSD.
23rd of January 2026:
I reached out to the seller, got a response and decided to purchase a TP-Link 8 port easy smart switch (TL-SG108E) on Amazon, this would be the backbone to getting everything to work, it was very fitting as just last yr I installed 2x TP-Link X50 Decos as the new main router within the house, little did I know this was just the start of the rabbit hole.
24th of January 2026: Bare metal: Transitioning to Proxmox & Linux CLI
I picked up the workstation from the seller, I then decided to install Proxmox VE onto the workstation, this SFF workstation became the main node. I went and installed Ubuntu server as a VM within the Proxmox VE environment, being familiar with windows command line is one story but being familiar with a linux distro's command line was another thing. As I'm more of a GUI admin I installed Portainer straight after and the two things I did was setup a Minecraft Java server and Pi-hole DNS server. At first Pi-hole didn't work and I needed to keep researching on how to correctly configure it, but the Minecraft server was working correctly within my local IP as it wasn't port-forwarded yet.

25th of January 2026:
The day I finally figured out how to get Pi-hole working correctly on my network, the issues that made Pi-hole not run the day prior were because it didn't have the correct directories, so it was back to SSH into my Ubuntu server's command line and using the simple mkdir command to create these directories and then like magic it worked. I also figured out how to port forward my Minecraft server, the way I did this was very simple. I created a DDNS through the TP-Link deco app and named it specifically to be lozmcservers.tplinkdns.com I didn't like the naming scheme so I decided to purchase a domain off Cloudflare and CNAME the DDNS so I could have a custom domain.
27th of January 2026:
I went into work and decided to tell the ICT manager what I have been up to recently and how I'm learning system administration and have my own server setup at home, he then asked me if I'd like to take home a free server he never ended up using, little did I know this was a massive powerhouse later down the line.
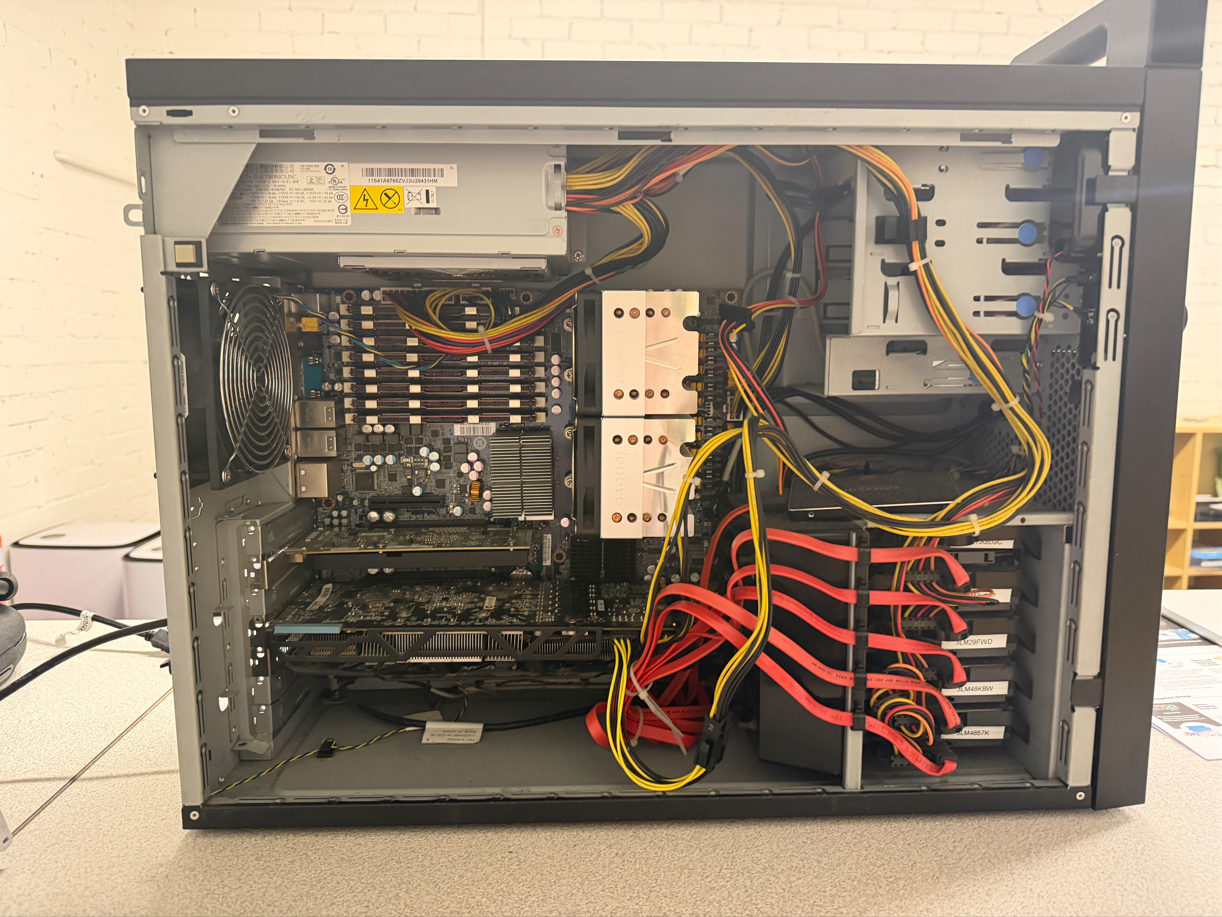
28th of January 2026: The powerhouse arrival: Dual-Socket Xeon Beast
I collected the server from the ICT manager and checked out the server while I was at work, I was surprised it was a dual socket Xeon Lenovo ThinkStation D10 from around 2009, specs were 2x Xeon X5460 CPUs, 10GB of DDR2 ECC ram running at 600MHz, 5 SAS hard drives and a Samsung 860 Pro 256GB as the boot drive. This server was fully wiped of anything minus the remaining install of Windows Server? As I didn't think of using Windows Server at the time for myself I created a Proxmox VE boot DVD as the machine doesn't support USB booting as it's a machine with UFI bios. At home I fully wiped anything off of the machine during the install and then clustered it with my other node. This would become a nightmare as my initial idea was to run this server as a PBS (Proxmox VE backup server) with raid 10 redundancy in mind (4x 300GB HDDs), this server's PSU was rated at 1000W compared to my other Proxmox VE node which had a 180W Platinium PSU, this one was loud and pulled so much power due to the Nvidia Quattro and 2 Xeons installed which alone had a TDP of 120W per CPU, so this server would stay off unless I wanted to backup my first node. Which means if I restarted a service on the other node and the ThinkStaion was turned off I would recieve a "cluster not ready - no quorum (500)" error which means the cluster couldn't verify status between all machines as 50% were offline and 50% were online, this also means that the cluster couldn't agree if it was allowed to startup a VM (e.g Ubuntu server docker installation)
29th of January 2026: The VPN Struggle: Wireguard vs Tailscale
I decided to give installing Wireguard a shot before I started work, this didn't go to plan at all I thought it would originally take me 15 minutes max, turns out the conclusion I came to was my ISP blocked port forwarding UDP port 51820 which was needed, I then attempted to install Tailscale which I knew used Wireguard as the backend, this took me about 10 minutes and it worked straight away.
Then after work I spent about 3 hours after work trying to get PBS working on the ThinkStation however all my attempts would straight up fail as I was still learning Proxmox and didn't correctly setup backups so the storage destination was never found even though the server was on, this really pulled me down and I couldn't figure it out at all. I then decided I'd just create a backup schedule on my other node which would keep a few days of backups incase I needed to rollback anything. The next future plan would be buying a QNAP Nas or UniFi UNAS Pro 4 and putting 4x 8TB Seagate Ironwolf drives and running that as RAID 10 for redunancy and using that for Immich to backup all photos to my 'cloud'
30th of January 2026:
After work I took out one of the SAS drives in the ThinkStation and thought to use that as the temporary backup drive within the first Proxmox node, this failed as at the time I didn't research that SAS to SATA didn't work and doesn't just magically work, so I heard the drive platters startup when the I pressed the power button on the first node but straight away it would stop spinning up, I did my 5 minutes of research and then found it wasn't possible so I took the drive out and put it back in the ThinkStation.
7th of February 2026:
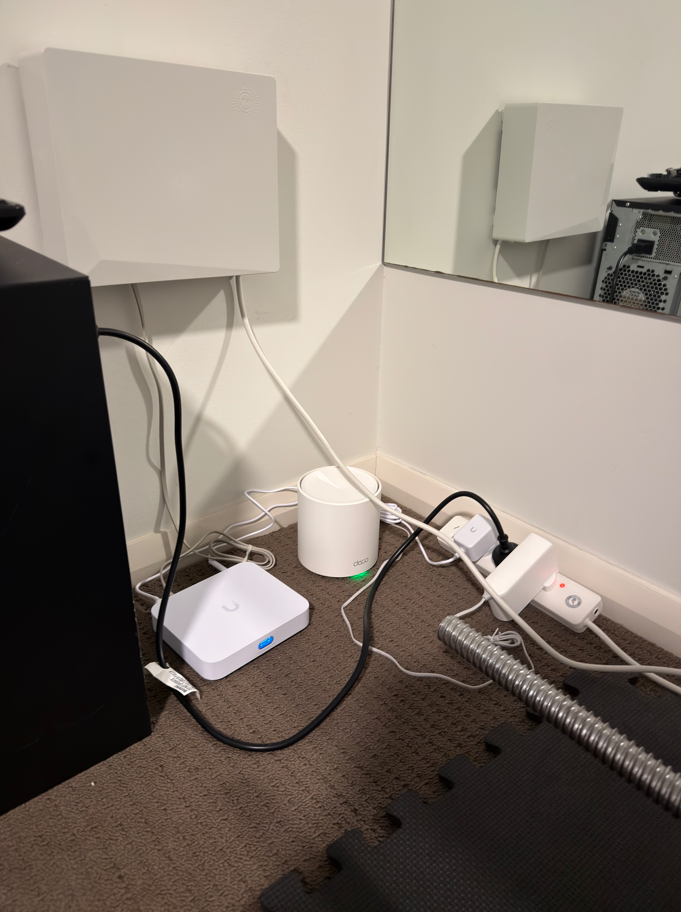
I decided to take a break from everything and do some more research, as it would be better to take a few days off from playing around with the setup and mentally refresh myself. I was talking to my mentor and we were talking about his server setup at home, he was showing me how he runs his home-lab and the infrastructure behind UniFi and how awesome they are. I originally started doing my researching into UniFi's line of products when I first started and he showed me how everything was very simple to use and the big seller for me was remote management anywhere in the world, VLAN support and dedicated IoT network. I did some research that night into Cloud Keys and the Cloud Gateway Ultra, which had the expensive cloud key built into it already. As luck had it my local JW Computers had the Cloud Gateway Ultra on sale and I decided to do more research into implementing the gateway within the network.
8th of February 2026: The Network Brain Surgery: Migrating to UniFi
I decided that I would go and purchase the Unifi Cloud Gateway Ultra at the time I paid $189 so I got a good $40 off. Little did I realise this would take me from the surface of the rabbit hole only deeper and deeper. It took me about 30 minutes to turn off the original Deco X50's and put them into AP mode which then made the whole internet black out, that's all good I thought so I plugged in the Cloud Gateway Ultra and it started to download the OS which was great, luckily with the speeds we get from our ISP the download was pretty fast took about 5 minutes to complete. But I ran into my first hurdle I needed to create a UniFi account and get an MFA code, which we had no WiFi so there was an issue I needed to go outside and hold my phone into the sky for a solid 2 minutes and pray I got a code, luckily I did and put it into the app, luckily it worked and I was able to continue with setup, it tested the ISP speeds and we were getting exactly what we pay for, I completed setup and plugged in the Deco's as they were in AP mode already, I was thinking to myself how would I explain I changed the routers over and needed to put a new SSID into each device we had, funnily enough I saw devices connecting to the network again automatically such as my phone, then my personal laptop did, then I tried pinging a website outside the network and it worked. I still don't understand how the UniFi Cloud Gateway took the SSID from the Deco's and everything connected back up, but I wasn't complaining at all.
Now for the fun part which was telling my friends the Minecraft server would be offline for an hour, I had to learn how to change my main Proxmox node's static IP and gateway, due to Deco and UniFi both using different subnets and IP formats I needed to change it, originally it was a 192.168.68 address which I think Decos use to ensure no conflicts occur with any routers if they are already running within the network as most routers will snatch 192.168.1.1, I then had to change the IP to be a 192.168.1 address and the subnet accordingly. This worked but I was wondering why didn't my IP show on my UniFi app, I finally found my first node with a completely different IP, of course this new IP I set would work and did work with my testing but due to switching routers every single DHCP reservation I had reset. So I than changed the IP on the first Proxmox node accordingly with the IP shown in the UniFi app so it was easier to track any traffic.
I then had to create a DDNS with DuckDNS and create a script on my first node to automatically update my Public IP, due to us having a Dynamic Public IP which I wasn't going to pay my ISP $15 extra per month to be a Static Public IP. I then port forwarded the Minecraft port (25565 TCP & UDP) and changed the CNAME record and everyone was back on the Minecraft server with the same custom domain IP as before.
10th of February 2026:
I thought of the idea why not install Windows Server 2019 and learn how to create a DC, GPO's and Users within my home network, that was a fun idea from the outside but when you have a dinosaur as your second server it becomes harder. I decided the easiest way was to create a PXE server and install the ISO via Ethernet which would've worked out to be faster however my attempts at getting the ThinkStation to boot PXE didn't work, I believe this to be an issue internally and a connection between the first Proxmox node and the ThinkStation wasn't communicating correctly, due to receiving an IP address and MAC address which wasn't the Proxmox node at all.
11th of February 2026: Ghost in the machine: Deploying Windows Server 2019
I pondered on the idea of taking out the SSD and using a Thinkpad at work to install Windows Server 2019 straight onto the SSD, thankfully this worked and I was able to wipe Proxmox and install it straight on the SSD, I went home and put it back into the server and it was checking the hardware for a few minutes and booted straight into Windows Server 2019 with updated hardware, I was surprised at first it worked due to the ThinkStation having only DDR2 but it still worked pretty well. I promoted the ThinkStation to be the domain controller and created some Users, GPO's and policies with AD-DS and Group Policy Management Console (GPMC). I realised I had an issue with Proxmox, my old node was still there and I needed to delete it and more importantly take everything out of the cluster. Luckily this was simple as I found the commands from someone who had a node which previously broke and needed to be removed from the cluster.
13th of February 2026:
I created a Windows 10 Enterprise VM install on my First Proxmox node, as both my servers run without displays I needed to RDP into both of them so at one point I had both of my PC displays with 2 different RDP sessions running and I had to figure out how to join my Domain on that Enterprise install, this was very simple and I was able to add it into the Domain and then classify where the computer was within my Domain, as I have many different OU's setup I just moved the VM into the correct OU. Which was Downstairs or Upstairs and those both contained, users, computers, roles, groups and a few other OU's within them as well.
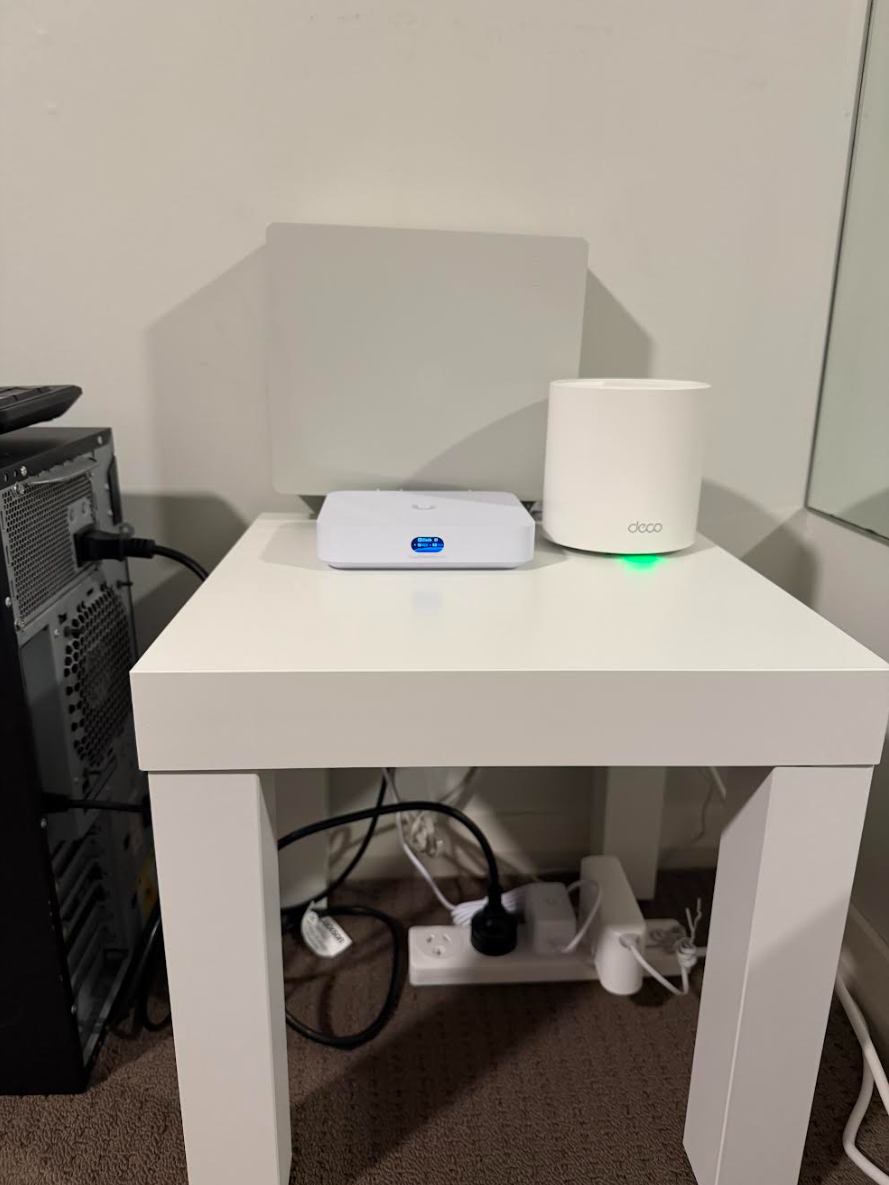
14th of February 2026: The "Lack-Rack" Revelation: Aesthetic Infrastructure
I decided the current setup needed a small makeover, I went to IKEA and purchased a LACK side table, anyone who works within ICT will know about the infamous LACK server rack, I decided not to pursue that idea but to pursue the idea of making the setup more clean and less messy. This turned out to be a good idea as it only cost me $12 but makes the setup look and feel more clean.
22nd of February 2026:
I decided to spin up the ThinkStation which is my current DC for learning and applying any policies. My goal was to fix any issues with GPO's not applying correctly, as a reminder to previous updates I have 2x OU's named Upstairs and Downstairs with other OU's contained within them such as Computers, Users & Groups. The current policies on the plate to fix were wallpapers & blocking control panel access to all non-administrive users. Due to my DC recieving the same policies that my Windows 10 Enterprise VM was recieving, I had to figure out how to get that fixed up. Originally I had no idea why it was occuring, but it turns out 'Block Inheritance' needed to be turned on for my DC's then the usual "gpupdate /force" within cmd, I checked it and then the administator account was unblocked from using Control Panel and System Settings. I spun up the Windows 10 Enterprise VM within my first Proxmox node and I logged in as one of many test accounts located within my AD-DS, tested out Control Panel and it said I lacked the required permissions, which meant mission success!
Now the next hurdle making my wallpapers work, I knew that my current policy wouldn't work as the current wallpaper was a file set within the DC's C:\ drive. I had to ask my mentor what's an easy way to get this wallpaper across both of the machines, it turns out the answer was very simple, the correct path I should have been using all along is \\mydomain.local\NETLOGON, I was warned not to overload this SYSVOL share with more than 30MB of data and use it for smaller scripts & small wallpapers.
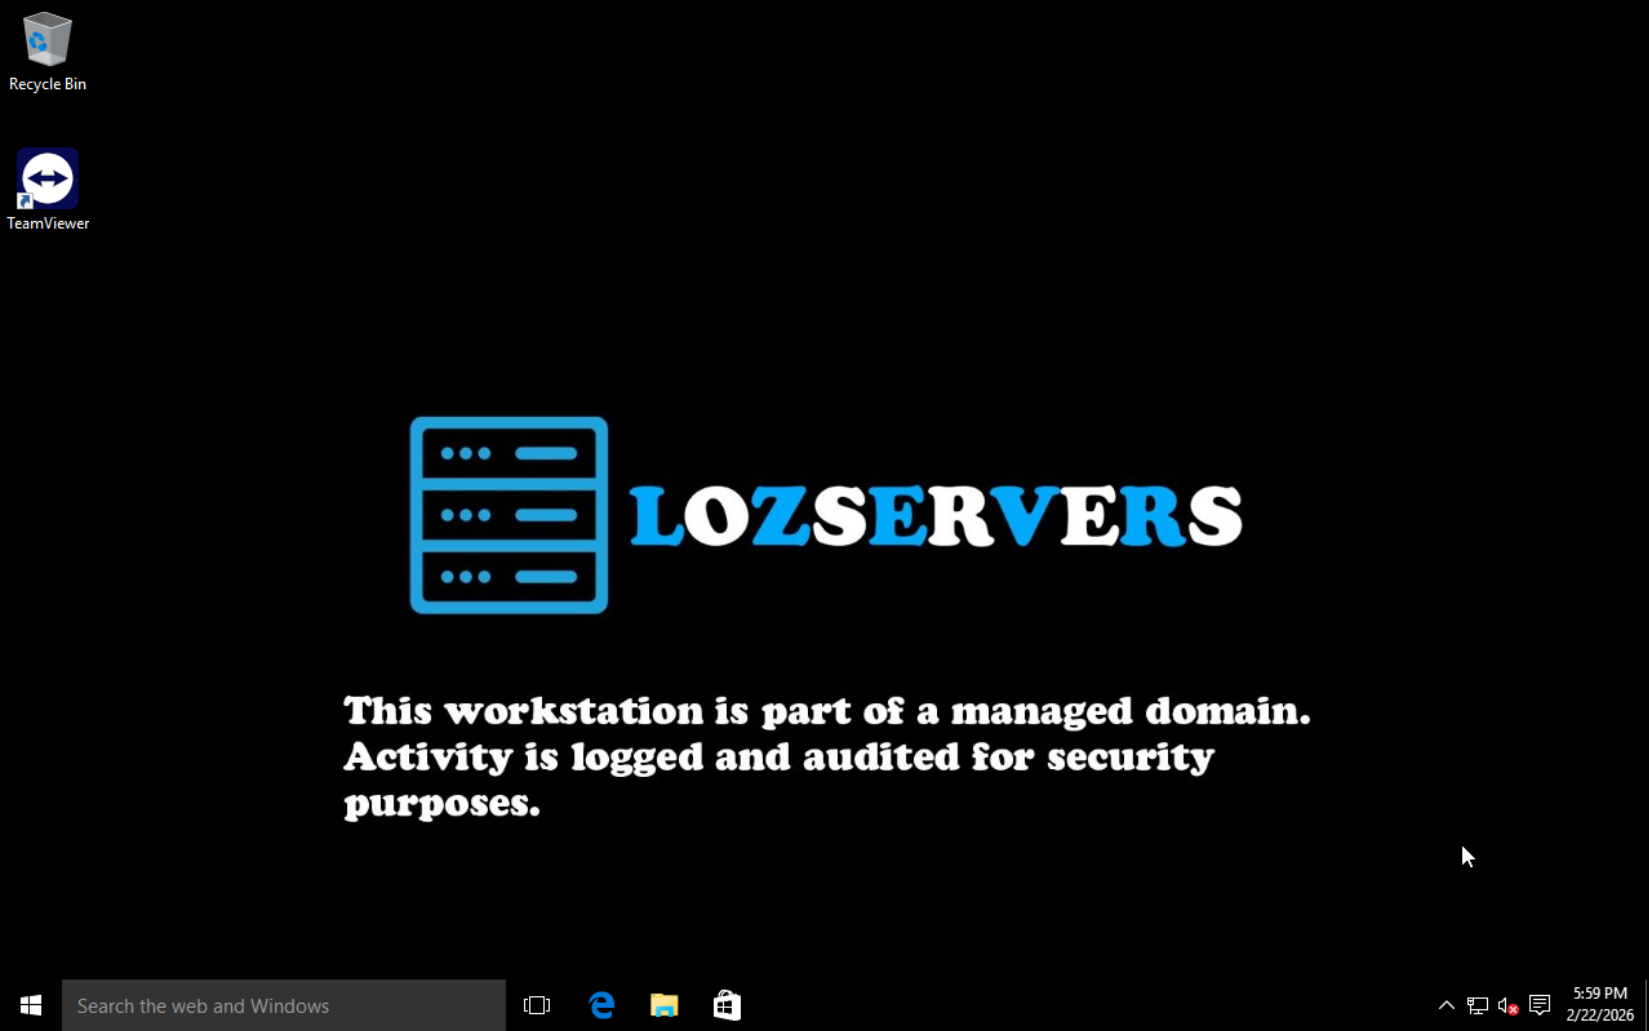
Next I mocked up a design within Adobe Photoshop to use as the current wallpaper. With filesize in mind I used 1920 x 1080p for the resolution for two different reasons, firstly it is still the most common resolution and secondly I had to be consider the filesize, next I put that wallpaper into the "\\mydomain.local\NETLOGON" path. I did the usual "gpupdate /force" then logoff my DC, login again, logoff my test user/s on the Windows 10 Enterprise VM then logon again and there it was the wallpaper I was hoping for and every user had the correct wallpaper now. I also decided to update my security login screen for my DC.
23rd of February 2026:
After work I decided it was time to properly setup VLANs within my network, this was surprisingly easy for me, I moved the ThinkStation to an older display which is ironically an old Phillips TV inside of the same room. I powered on the ThinkStation and went straight to IPv4 network setup as the ThinkStation is already set as static, but I didn't go and change the IP & Subnet of the DC straight away (foreshadowing). I wanted to login to my Windows 10 Enterprise VM as the local administrator so I could at least change my DNS server, however this didn't go to plan as I forgot the local administrator password. I attempted to change the password via QEMU within the Proxmox node, however I also forgot to install QEMU tools on the VM install. Luckily in my case since I didn't go full throttle with VLANs straight up or this would've been my kryptonite. Anyways since I still had access to my domain via the VM I just logged in as my domain administrator account, went into compmgt.msc and then local users then reset the local administrator password. I tried to signin as local administrator but I forgot accounts lock themselves when the passswords are reset, so I unlocked the local administrator and then I signed in as the local administrator on the VM, only then I was sure I could change the DNS server without being fully locked out of the domain.
I then logged into my UniFi router and created the VLAN which was another simple step, as for security reasons I will not being writing the new VLAN on this website, I then mapped the port my DC is connected as the new VLAN. I could then finally go back to my DC and change the IP address and secondly my Subnet mask. After applying I saw packets were already being sent and recieved so I knew I did that correctly, I then tried to ping my router (4 receieved), next I pinged my Windows 10 Enterprise VM (4 recieved). I went back to the enterprise VM and change my DNS server. I applied the settings and restarted the VM, I attempted to login as one of my many test users and I was met with success, just like magic I was back in, but this time I had VLAN segmentation setup correctly.
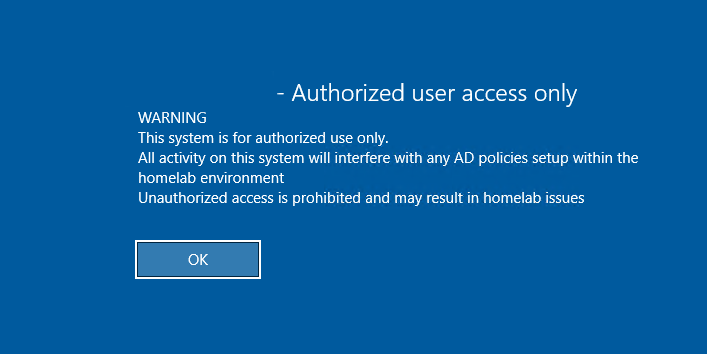
I also decided to create a GPO for the Interactive Security Screen, currently this was only setup on the DC but only locally as I wanted to deploy this on all computers within the domain I needed to create the GPO, luckily it was a very simple GPO to create as all I needed to do was go into Computer Configurations, Policies, Windows Settings, Security Settings, Local Policies then Security Options and find the Interactive logon title and message for users attempting logon. I then created it linked the GPO back to the correct OU's then the usual "gpupdate /force". I then shutdown the Windows 10 Enterprise VM and when I attempted to login I was met with the Security message which ensured that the GPO was setup correctly.
26th of Feburary 2026:
I was thinking about creating a RAID pool with the 4 hard drives within my D10, since all the HDD's are 300gb SAS drives I thought why not create it as a fileshare for all my users later on, this was a bit of an annoying thing to setup as I had to create storage pools within File and Storage services in Windows Server Manager and then create the actual RAID itself. I checked over in Disk manager and thankfully it worked, I then shared the drive over network. The next part was creating the actual GPO itself for all domain users so I could map the drive to their account automatically on signin. I started by opening GPMC and created my fileshare GPO, which is also pretty simple as all I need to do was navigate to User Configuration, Preferences, Windows Settings, Drive maps. I created the new drive map and listed the usual details of where this drive was located, drive name and the drive letter to be assigned to the drive. I then assigned it to my domain user OU's. I could have assigned this to seperate groups however I see this as being a 'company wide' fileshare for important documentation to be uploaded to. I did the usual "gpupdate /force" and spun the Windows 10 Enterprise VM and the fileshare was in front of my eyes.
2nd of March 2026:
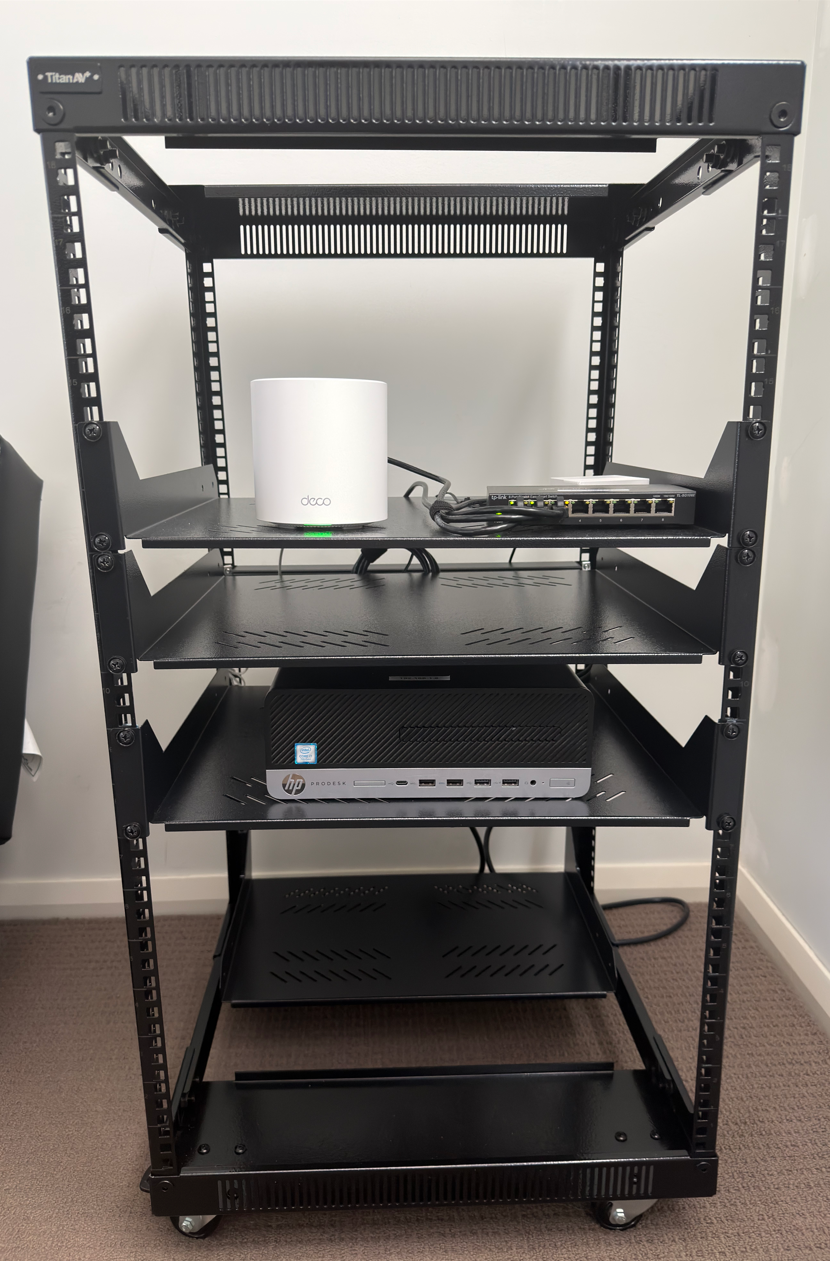
I ordered in a server rack from TitanAV the week prior and it finally got delivered, I got to work straight away with building this rack, I ordered an 18U rack to hopefully support my future needs as I would like to purchase a Unifi Pro Max 24 and Unifi Dream Machine (UDM) Pro in the future. It took me about an hour to build the rack but it is simply very sturdy and I highly recommend their products.
13th of March 2026:
I ordered some shelves and a 12-way PDU from TitanAV earlier in the week and it got delivered, currently as it stands I have the first 4RU's reserved for a future patch panel, Unifi Pro Max 24, UDM Pro & Brush panel. Currently on my shelf between RU 14-13 is my first Deco AP, Unifi Cloud Gateway Ultra and I also moved my SG-108 into the rack as well, then we move onto RU 12-11 which I will be using for 4 Proxmox nodes running on a different VLAN for HA in the future, this will also house my second Windows Server 2019 DC in the future and lastly from RU 10-8 that is currently housing my first Proxmox node. Also at the bottom of the rack on the otherside I added in a shelf to house a UPS in the future for my switch, FTTP NTD, Router & future NAS. This leaves me with about 7RU of spare space to add any extra items I may need in the future.
17th of March 2026:
I was asked by some other friends if we could do a Minecraft server, since I was telling them about this whole project. As it stood the current Minecraft server was for my second friend group, so I researched if I could run 2 servers from the same Docker install and using the same IP address which turned out to be true, so I logged straight into Portainer created another container using 'ITZG's Minecraft server latest image' and instead of mapping the port as Host: 25565 and Container: 25565 TCP, I had to map it as Host: 25566 and Container 25565 TCP. I spun up the container and gave my account OP access via Proxmox in my Ubuntu CLI by listing the Docker container then 'OP myuser' so I could enforce a Whitelist on this second server. I had to create a second Port Forwarding rule within my Unifi and then I checked it with canyouseeme I also checked on my DuckDNS and thought I would've had to create a new Domain and create a new CNAME record with my provider however, I typing in the IP currently set for the first server but just added in port 25566 (ip:25566) and instead of my usual server showing up I saw 'A Minecraft Server' for the server description, I turned on whitelist and now I have two Minecraft servers running from the same IP address.
To be continued...
Special Mentions:
I would like to thank my mentor (Patrick) for providing professional guidance throughout this project. His experience with Active Directory and Proxmox has been invaluable for helping me align this lab with the best practices throughout the industry.